Appearance
Post Generation
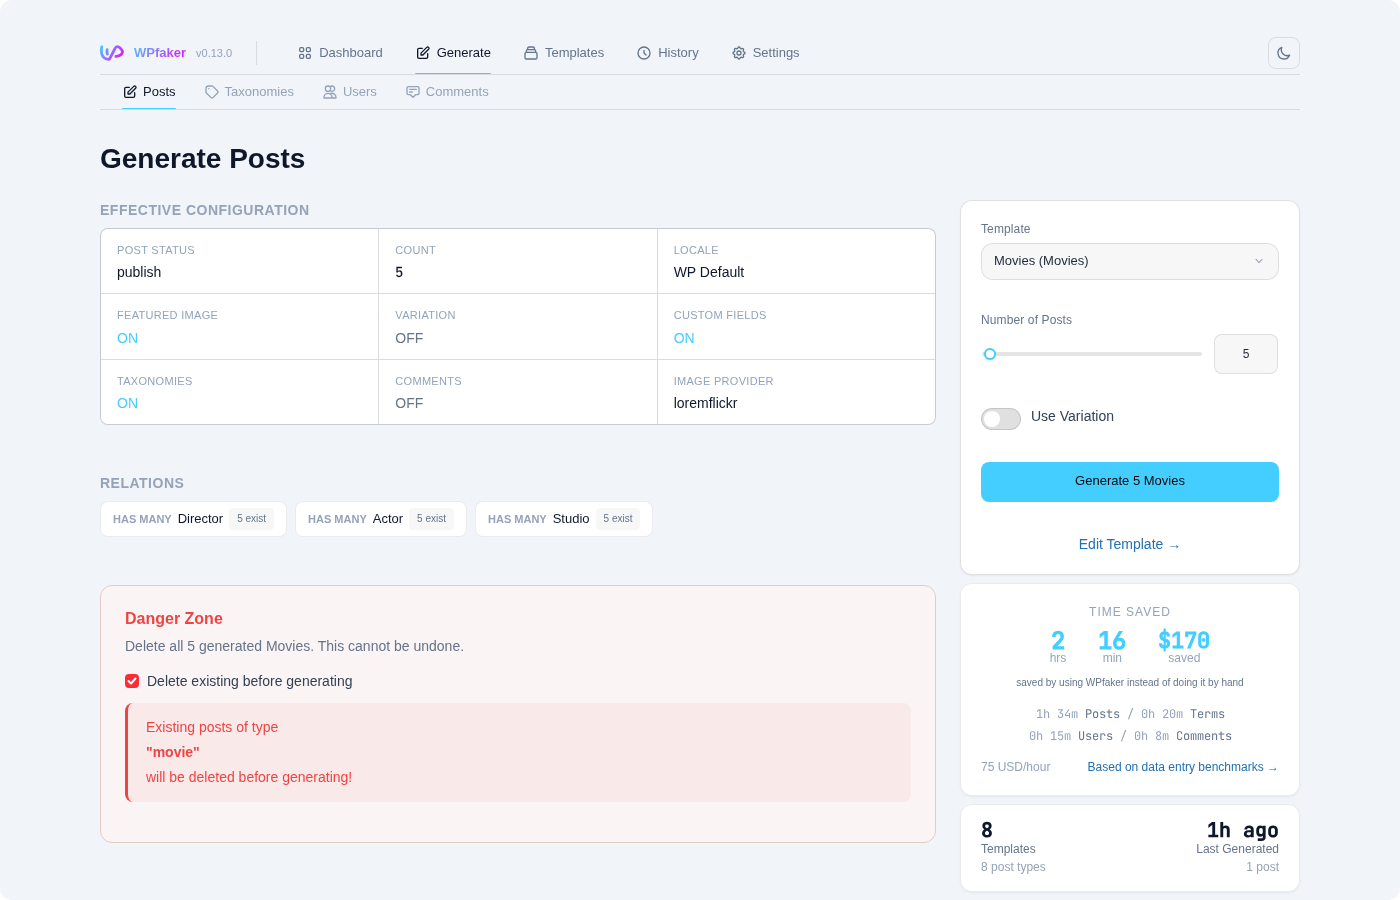
Post generation is the central feature of WPfaker and the one you will use most often. It allows you to create any number of realistic, fully-populated WordPress posts — complete with featured images, custom fields, taxonomy assignments, and author attribution — in a single operation. Whether you are building a theme, developing a plugin, testing a client site, or preparing a demo environment, this page walks you through every option available in the post generation interface.
Post Type Selection
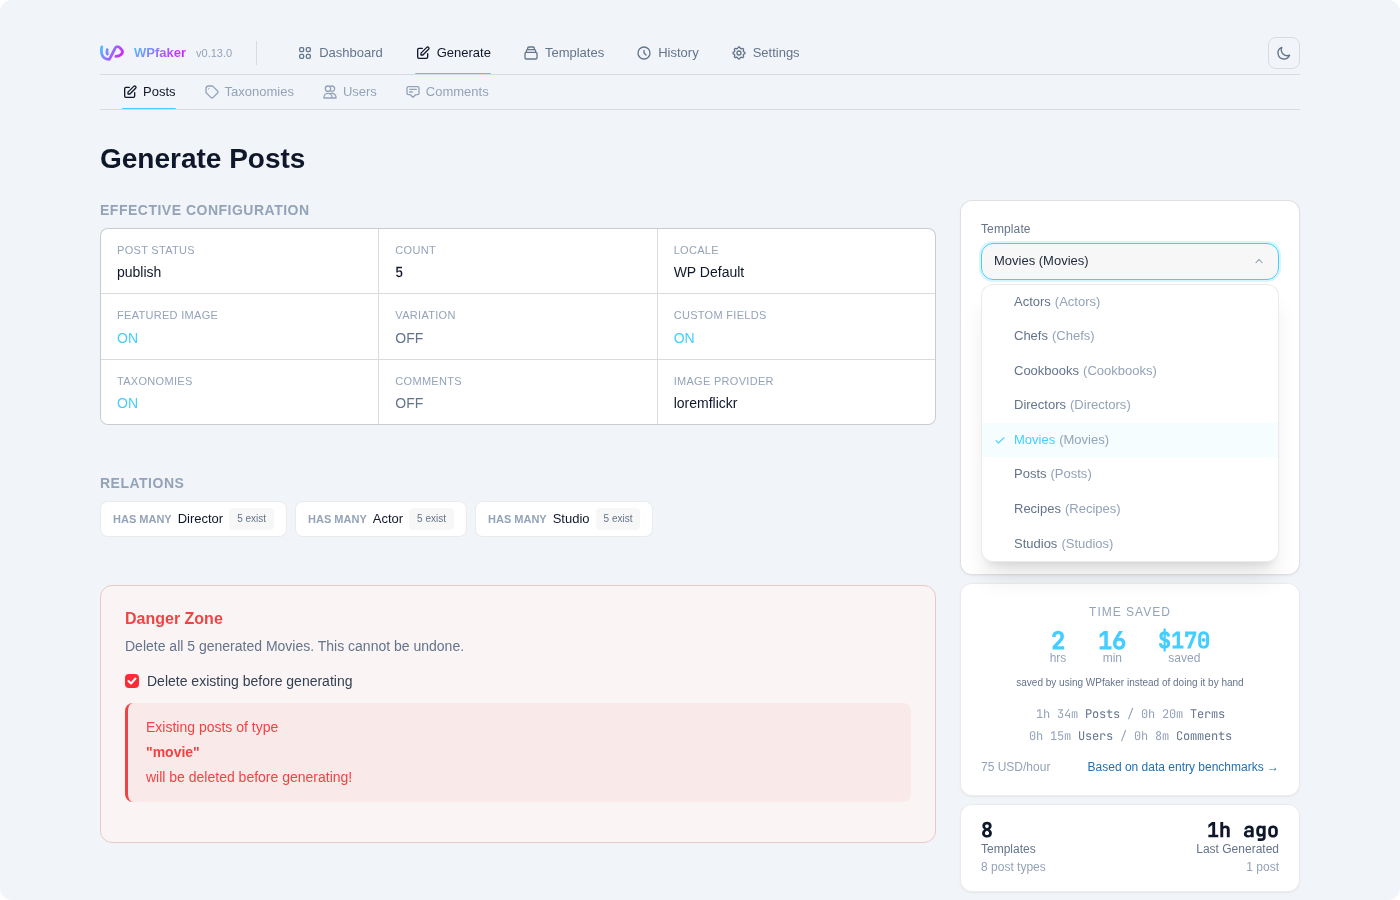
When you open the Generate Posts panel, the first thing you choose is the post type you want to generate. WPfaker reads all registered post types from your WordPress installation, so in addition to the built-in Posts and Pages, you will see every custom post type (CPT) that your theme or plugins have registered. This includes portfolio items, property listings, testimonials, events, or any other CPT present on your site.
As soon as you select a post type, the interface dynamically updates to reflect the capabilities of that type. WPfaker loads the available taxonomies (categories, tags, and any custom taxonomies associated with the type), detects custom fields from supported field plugins, and reads the features the post type supports (title, editor, thumbnail, excerpt, and so on). This means the generation form always shows exactly the options that are relevant to the type you have selected — nothing more, nothing less.
Number of Posts
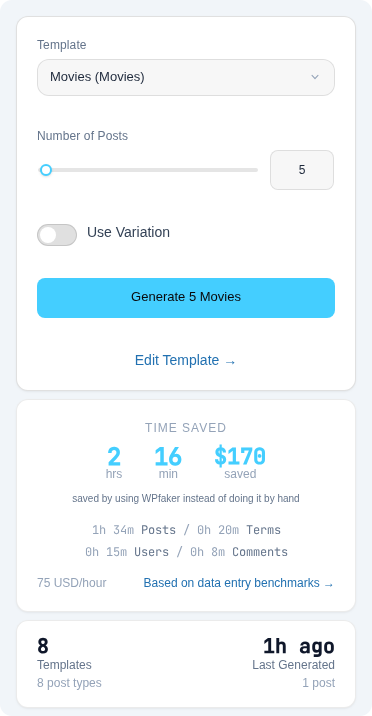
The slider on the Generate page lets you select between 1 and 500 posts. You can generate any number within this range regardless of your server's resources, because WPfaker automatically splits the work into manageable chunks behind the scenes (see Chunked Generation below).
Chunked Generation
WPfaker automatically splits large generation requests into smaller chunks. Instead of sending all posts in a single request that might exceed server limits, it divides the total count into batches and sends each batch as a separate request.
The chunk size is calculated from your server's PHP memory_limit and max_execution_time — typically between 10 and 50 posts per chunk. Each chunk streams progress updates in real time via Server-Sent Events (SSE), so you see posts appearing as they are created.
For example, generating 100 posts on a server with a chunk size of 25 produces four sequential requests of 25 posts each. The progress bar updates continuously across all chunks, and you can cancel at any point between chunks.
INFO
Chunked generation is fully automatic. You select the total number of posts you want, and WPfaker handles the splitting based on your server's capacity. There is no need to manually batch your requests.
Post Status
Every generated post needs a WordPress status. WPfaker offers the following options:
Random is the default and usually the best choice. It assigns a natural mix of statuses across your generated posts, giving you published posts for frontend testing, drafts for admin testing, and a smattering of other statuses for workflow testing — all in one batch.
Publish makes all generated posts immediately visible on the frontend. Use this when you are specifically testing how your theme displays content to visitors, checking archive pages, or preparing a demo site that needs to look populated right away.
Draft keeps all posts hidden from the frontend. This is useful when you want to review generated content before making it visible.
Pending sets posts to "Pending Review," which is useful for testing editorial workflows. If your site uses a multi-author setup where editors approve contributions, generating pending posts lets you verify that the review queue, notification emails, and approval process all work correctly.
Private creates posts that are only visible to logged-in users with appropriate permissions. This is valuable for testing membership plugins, restricted content areas, or admin-only content sections.
Future schedules posts for publication at random future dates. Use this to test how your theme handles scheduled content, whether your scheduling UI displays correctly, and whether WordPress cron jobs pick up future posts as expected.
Language
WPfaker generates content in the locale configured in your Language settings by default. To generate content in a different language, set the locale in your template configuration. Each template can specify its own locale, so you can create separate templates for different languages and switch between them on the Generate page.
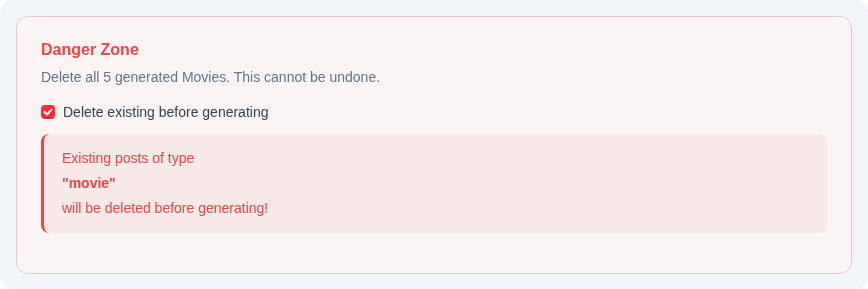
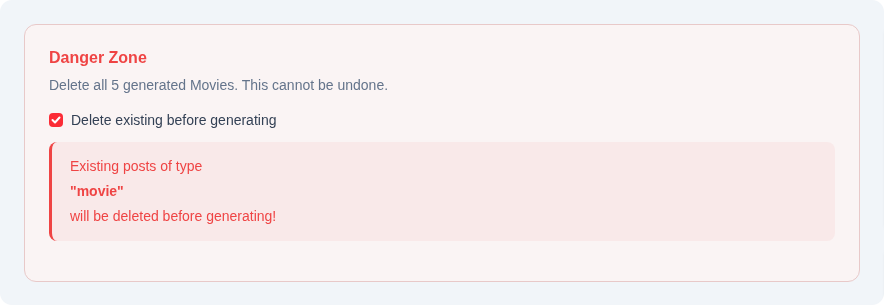
Danger Zone: Delete Before Generate
At the bottom of the generation panel, a clearly-marked Danger Zone contains the Delete Existing Posts toggle. When you enable this option, WPfaker will permanently delete all previously-generated posts of the selected type before creating the new batch. This gives you a clean slate each time you generate, which is extremely useful during iterative development when you want to start fresh without manually cleaning up old test data.
DANGER
Deletion is permanent and cannot be undone. However, only posts that WPfaker itself created are affected — your manually-created content is always safe. WPfaker tracks every item it generates in its History system, and only items in that history are candidates for deletion.
When you activate Delete Before Generate and click the generate button, a confirmation modal appears with five checkboxes that let you control exactly what related content gets removed alongside the posts:
Delete related Media (on by default) removes any featured images and gallery images that were downloaded and attached to the posts being deleted. This keeps your Media Library clean and prevents orphaned image files from accumulating over repeated generate-delete cycles.
Delete related Terms (on by default) removes any taxonomy terms that WPfaker created during previous generation runs. If you had auto-created categories or tags, they will be cleaned up along with the posts.
Delete related Authors (on by default) removes any fake author accounts that WPfaker created. If you used the auto-create authors feature, those user accounts will be deleted as well.
Delete related Comments (on by default) removes any comments that WPfaker generated on the posts being deleted. This prevents orphaned comment threads from accumulating across repeated generate-delete cycles.
Delete related Post Types (conditional) appears only when the selected post type has cross-CPT dependencies. When enabled, it removes auto-created posts of dependent post types that were generated by the Dependency Resolver.
You can configure the default state of these three checkboxes in Settings > Data Management, so they match your preferred workflow without requiring manual adjustment each time.
Content Variation
Real websites do not have uniform content. Some posts have featured images and some do not. Some have long, detailed articles while others are short updates. Some are tagged with a dozen categories and others sit in just one. WPfaker's content variation system replicates this natural diversity so your test data actually looks and behaves like real-world content.
To enable variation, toggle the Enable Content Variation switch in the generation panel. Once enabled, you can choose from four variation profiles, each producing a different distribution of content characteristics. For a deep dive into how each profile works, see the dedicated Content Variation page.
Random produces the most realistic results and is the recommended default. It applies a natural, unpredictable mix of characteristics across your posts — some get featured images, some do not; some have fully-populated custom fields, some have partial data; content lengths vary; taxonomy assignments differ from post to post.
Minimal generates sparse content where most optional fields are left empty. Only about 20% of posts receive featured images, and custom fields are populated at their minimum required level. This profile is useful for testing how your theme handles posts with missing data — empty thumbnails, missing excerpts, or absent custom field values.
Partial fills roughly 50% of available fields and gives about half the posts featured images. It sits between Minimal and Complete and is a good choice when you want some data variation without the extremes.
Complete populates everything on every post: all custom fields filled, all posts get featured images, excerpts are always present, and taxonomy assignments are generous. Use this when you need to verify that your layout handles fully-loaded content correctly.
First Post Rule
Regardless of which variation profile you select, the very first post in every batch is always generated with a complete profile. This ensures you always have at least one fully-populated reference post to compare against the varied ones, making it easy to spot layout issues caused by missing data.
The aspects that vary across posts include: whether a featured image is attached, whether an excerpt is included, how many taxonomy terms are assigned, which custom fields are filled and which are left empty, the length of the post content (short, medium, or long), and how authors are distributed across the batch.
Auto-Create Authors
In many testing scenarios, you want posts attributed to multiple different authors rather than all assigned to your admin account. The Auto-Create Authors toggle handles this automatically. When enabled, WPfaker generates a configurable number of fake author accounts (between 1 and 20, defaulting to 3) and distributes the generated posts among them.
Each auto-created author receives the WordPress "author" role and comes with a realistic, locale-aware profile: a first name, last name, display name, email address (using the safe @example.com domain), and a short biography. If you have selected a non-English locale, the names will match that language — German names for de_DE, Japanese names for ja_JP, and so on.
WPfaker is smart about reusing existing authors. If you have previously generated authors for the same locale, WPfaker will reuse those accounts rather than creating duplicates. This means you can run multiple generation batches and your author pool remains consistent. For more control over author creation, including role selection and custom user fields, see the User Generation page.
Auto-Create Taxonomies
Similarly, the Auto-Create Taxonomies toggle ensures that enough taxonomy terms exist for meaningful assignment. If your site has fewer categories or tags than needed for realistic distribution, WPfaker will create new ones up to the configured limits: a maximum of 1 to 20 categories (default 5) and 1 to 50 tags (default 8).
For hierarchical taxonomies like categories, WPfaker may assign random parent terms to create a more natural tree structure. For flat taxonomies like tags, terms are simply added to the pool. All auto-created terms are tracked in History and respect the current locale setting for name generation.
If you need more control over taxonomy structure — specific hierarchy depths, controlled term counts, or custom taxonomy population — use the dedicated Taxonomy Generation feature to create your terms first, then generate posts that reference them.
Image Options
WPfaker provides fine-grained control over how featured images are handled during post generation. The image system is covered in full on the Image Handling page, but here is an overview of the options available directly in the generation panel.
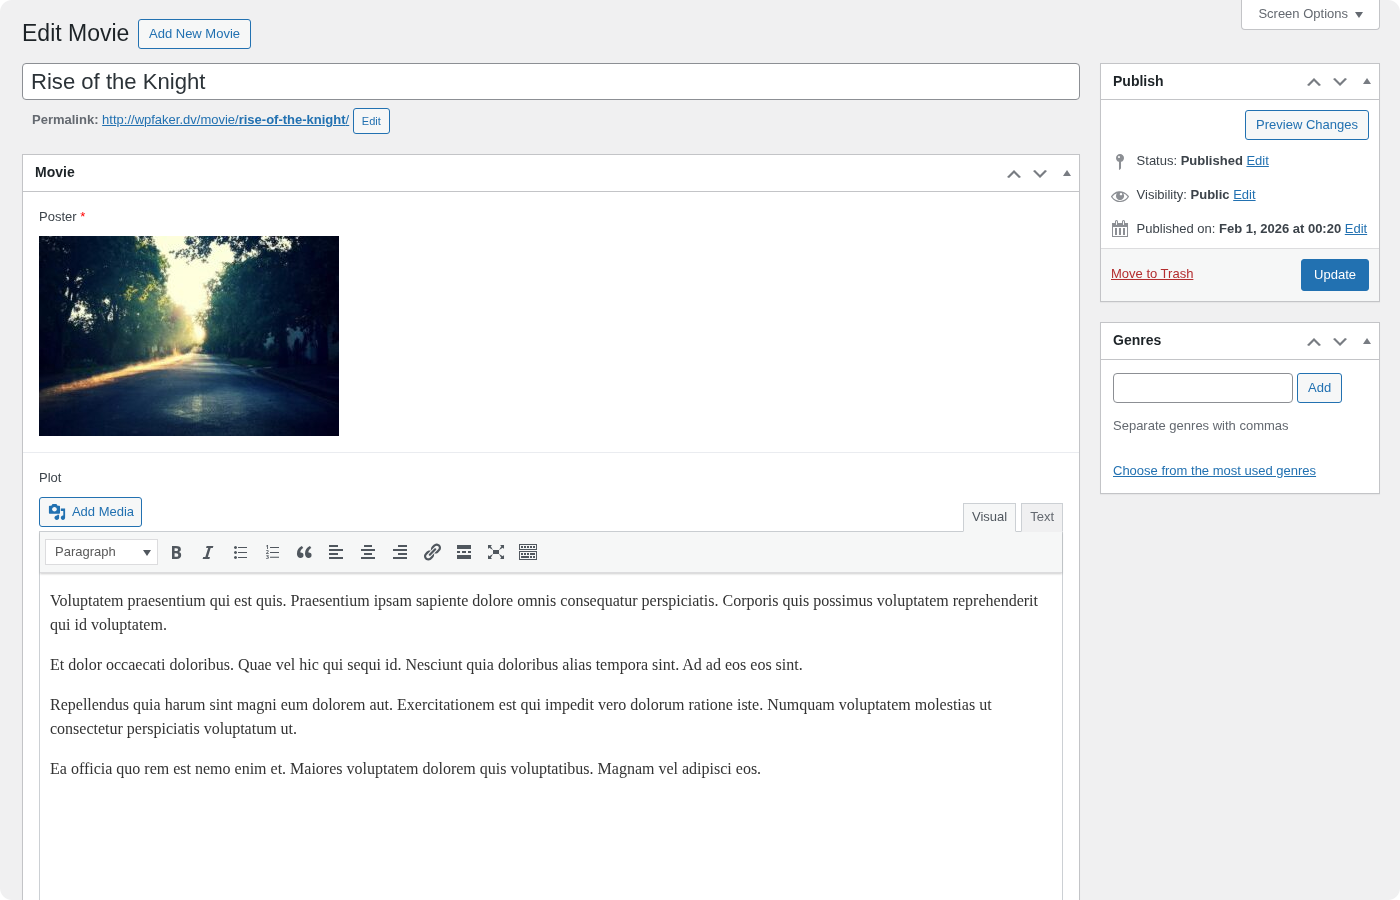
Set Featured Image
This master toggle controls whether generated posts receive featured images at all. When disabled, no image processing occurs and generation is faster. When enabled, posts will receive featured images according to the current variation profile (or all posts if variation is disabled).
Download New Images
When this toggle is on, WPfaker downloads fresh images from the selected provider for each generation run. When it is off, WPfaker reuses images already present in your WordPress Media Library. Reusing existing images is significantly faster and avoids unnecessary network requests, making it the better choice when you do not need unique images for every batch.
Media Reuse
When you use Delete Before Generate with the "Delete related Media" checkbox unchecked, the previously downloaded images become orphaned — they still exist in the Media Library but are no longer attached to any post. Rather than downloading new images on the next run, WPfaker detects these orphaned images and reuses them automatically.
Each image is tagged with its source post type when first downloaded. On subsequent generation runs, WPfaker builds a reuse pool of orphaned images matching the target CPT and draws from that pool before making any new downloads. This makes repeated generate-delete cycles significantly faster and avoids redundant network requests to image providers.
Image Provider
WPfaker supports four image providers, each suited to different use cases:
LoremFlickr (the default) serves real photographs from Flickr filtered by category keyword. No API key is required. It supports ten image categories with auto-detection based on the post type name.
Unsplash serves high-quality photographs from a vast library of professional and amateur photography. No API key is required — WPfaker accesses Unsplash through its own API proxy. Unsplash attribution is automatically added to image captions.
Lorem Picsum serves random photos from a curated collection. It is fast, reliable, and requires no API key.
Placeholder.com generates simple solid-color placeholder images with optional text overlays. These are not photographs — they are colored rectangles. This provider is ideal for pure layout testing where you want to see exactly how image dimensions affect your design without the visual distraction of actual photos.
Image Category
When using a provider that supports category filtering (LoremFlickr, Unsplash), you can specify an image category to get contextually relevant photos. For example, selecting "food" when generating restaurant menu items, or "nature" for a travel blog, produces much more convincing test content than random images.
Aspect Ratio
WPfaker supports a range of standard aspect ratios to match your theme's design requirements: 1:1 (square), 4:3 (classic), 3:2 (default, the standard photo ratio), 16:9 (widescreen), 21:9 (ultrawide), 2:3 (portrait), 3:4 (portrait classic), and 9:16 (vertical/mobile). The aspect ratio determines the relationship between width and height — the actual pixel dimensions are controlled by the sizing options below.
Image Sizing
You have two approaches to image sizing. The default is fixed width, where you specify an exact width in pixels (default 1200px) and the height is automatically calculated from the selected aspect ratio. This produces uniform image dimensions across all posts, which is useful when your theme expects consistent image sizes.
Alternatively, you can enable random sizing, which generates images with widths randomly distributed between a minimum and maximum value (default range 800 to 1600 pixels). The height for each image is still calculated from the aspect ratio, so proportions remain consistent even as dimensions vary. Random sizing produces a more realistic media library where not every image is identical, which is valuable for testing responsive image handling and srcset behavior.
Custom Fields
The Populate Custom Fields toggle activates WPfaker's automatic field detection and population system. When enabled, WPfaker scans for all custom fields registered for the selected post type and generates appropriate fake data for each one. This works with a wide range of field plugins:
- ACF / ACF Pro — all field types including repeaters, flexible content, galleries, and clone fields
- ACF Extended (ACFE) — both free and pro field types
- JetEngine — 22+ field types including relations and options pages (see JetEngine Fields)
- Meta Box AIO — all registered field types
- ACPT — all field types
- Native WordPress Meta — fields registered via
register_post_meta()
For a complete guide to how field detection works, including the two-tier detection system (pattern matching and AI-powered detection), see the Custom Fields and Field Detection pages.
Three-Pass Relational Field System
One of the more sophisticated aspects of WPfaker's field population is its handling of relational fields — fields that reference other posts, such as ACF's post_object, relationship, and page_link fields, or JetEngine's posts and post relation fields. These fields cannot be populated during initial post creation because the posts they need to reference may not exist yet.
WPfaker solves this with a three-pass generation system. In the first pass, all posts are created with their standard fields populated, but relational fields are skipped. In the second pass, WPfaker revisits every generated post and populates the relational fields, now that valid post targets exist. In the third pass, JetEngine relation tables are updated separately, since JetEngine stores relationships in its own database tables rather than standard post meta.
This three-pass approach ensures that relational fields always point to valid, existing posts, producing a consistent and realistic data set.
Assign Taxonomies
The Assign Taxonomies toggle controls whether generated posts are assigned to taxonomy terms. When enabled, WPfaker automatically assigns categories, tags, and any custom taxonomies associated with the selected post type. Each post receives a varied number of terms — some posts might get three categories and five tags while others get one category and two tags — producing a natural distribution that mimics real editorial behavior.
If there are not enough terms available for meaningful assignment, consider enabling Auto-Create Taxonomies or generating terms separately using the Taxonomy Generation feature before running post generation.
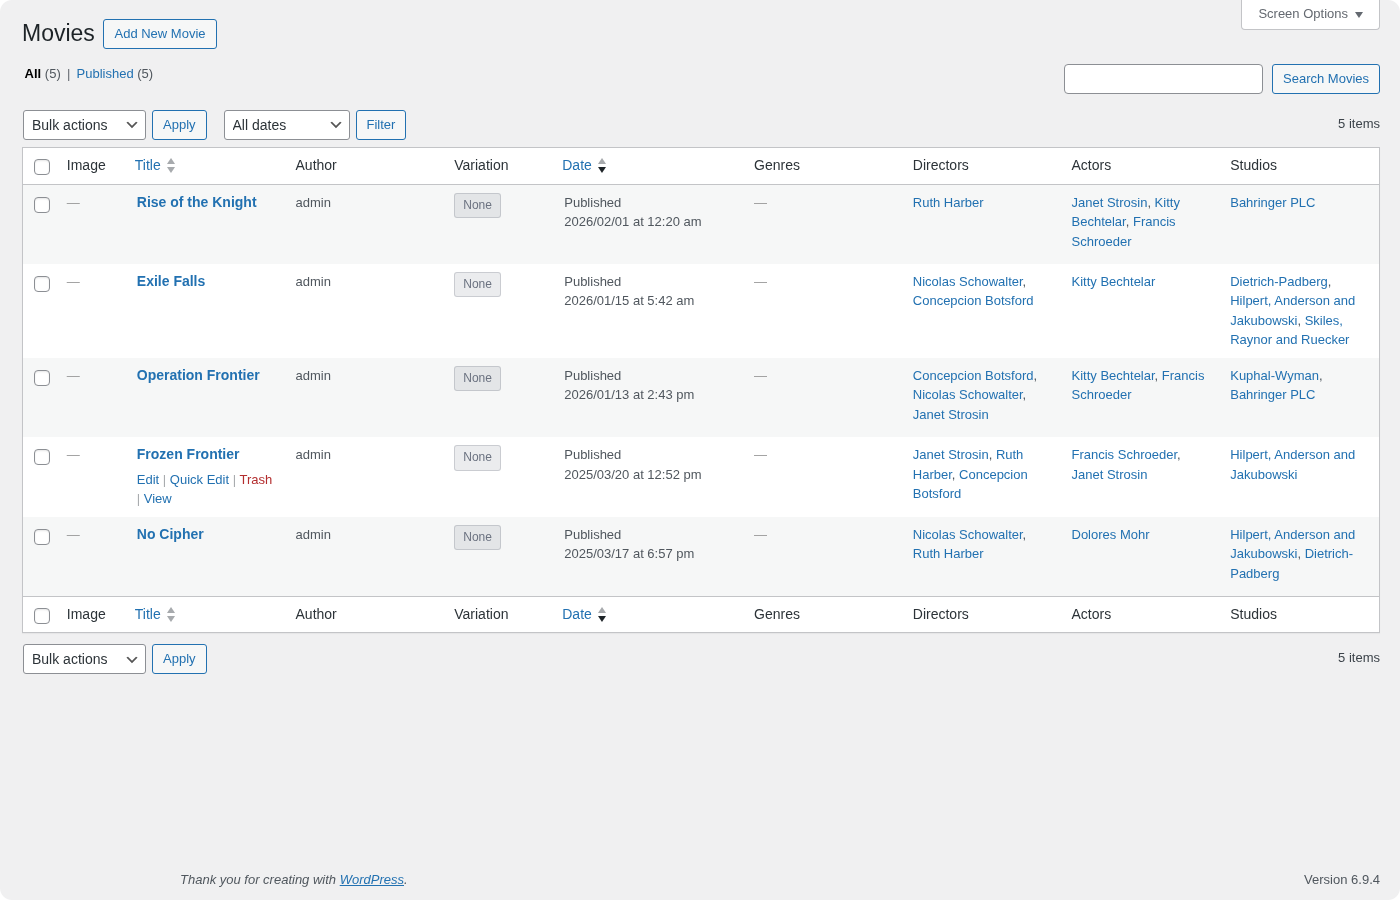
Generation Results
After generation completes, WPfaker displays a detailed summary of what was created. The results panel shows the total number of posts created, how many received featured images (and how many did not), which authors were used, how many category and tag assignments were made, and how many posts had custom fields populated. This summary gives you an immediate overview of the batch without needing to navigate to the post list.
All generated items are automatically logged in the History system, where you can review, filter, and selectively delete them at any time.
API Usage
You can trigger post generation programmatically via the WPfaker REST API. This is useful for automated testing pipelines, CI/CD environments, or custom admin tooling.
bash
curl -X POST "https://yoursite.com/wp-json/wpfaker/v1/generate/posts" \
  -H "X-WP-Nonce: your-nonce" \
  -H "Content-Type: application/json" \
  -d '{
    "post_type": "post",
    "count": 10,
    "post_status": "draft",
    "set_featured_image": true,
    "download_images": true,
    "image_provider": "picsum",
    "image_width": 1200,
    "image_height": 800,
    "populate_custom_fields": true,
    "auto_taxonomies": true
  }'
For complete API documentation, including all available parameters and response formats, see the Generation API reference. If you want to save and reuse specific generation configurations, the Template System lets you define named presets that can be applied via both the UI and the API.
Best Practices
When starting a new project, begin by generating a small batch of 5 to 10 posts as drafts. This lets you verify that your post type configuration is correct, custom fields are being detected properly, and the generated content matches your expectations — all without any content appearing on the frontend. Once you are satisfied with the results, you can generate larger batches with the publish status.
Always use content variation for any batch larger than a handful of posts. Uniform test data — where every post has identical characteristics — hides an entire class of bugs related to missing data, varying content lengths, and inconsistent field populations. The Random variation profile catches these issues early by producing the kind of messy, diverse content that real users will create.
Match your image dimensions to your theme's requirements. If your theme uses a 16:9 hero image at 1200 pixels wide, configure those exact dimensions in the generation panel. This ensures your test images are processed through WordPress's image sizing pipeline exactly as real uploads would be, catching any cropping or scaling issues during development rather than after launch.
For sites with complex custom field setups, generate a small test batch first and verify that all fields are populated correctly before running larger batches. If WPfaker's pattern-based detection misidentifies a field type, you can use the Template System to manually specify exactly how each field should be populated.
Finally, make a habit of checking the History page periodically. It gives you a clear picture of everything WPfaker has created, and its cleanup tools make it easy to remove test data when you no longer need it. Clean test environments lead to reliable test results.